Adding printers on a Mac:
1. Install the correct driver for the printer by visiting Ricoh Canada’s website at ricoh.ca. Choose the Support & Downloads option from their top menu bar and enter the name of the Ricoh model in the search box. Follow the steps on the Ricoh site for downloading and installing the print driver.
2. Go to your Mac’s System Preferences, choose the Printers & Scanners category and then click Add (+) to add a printer.
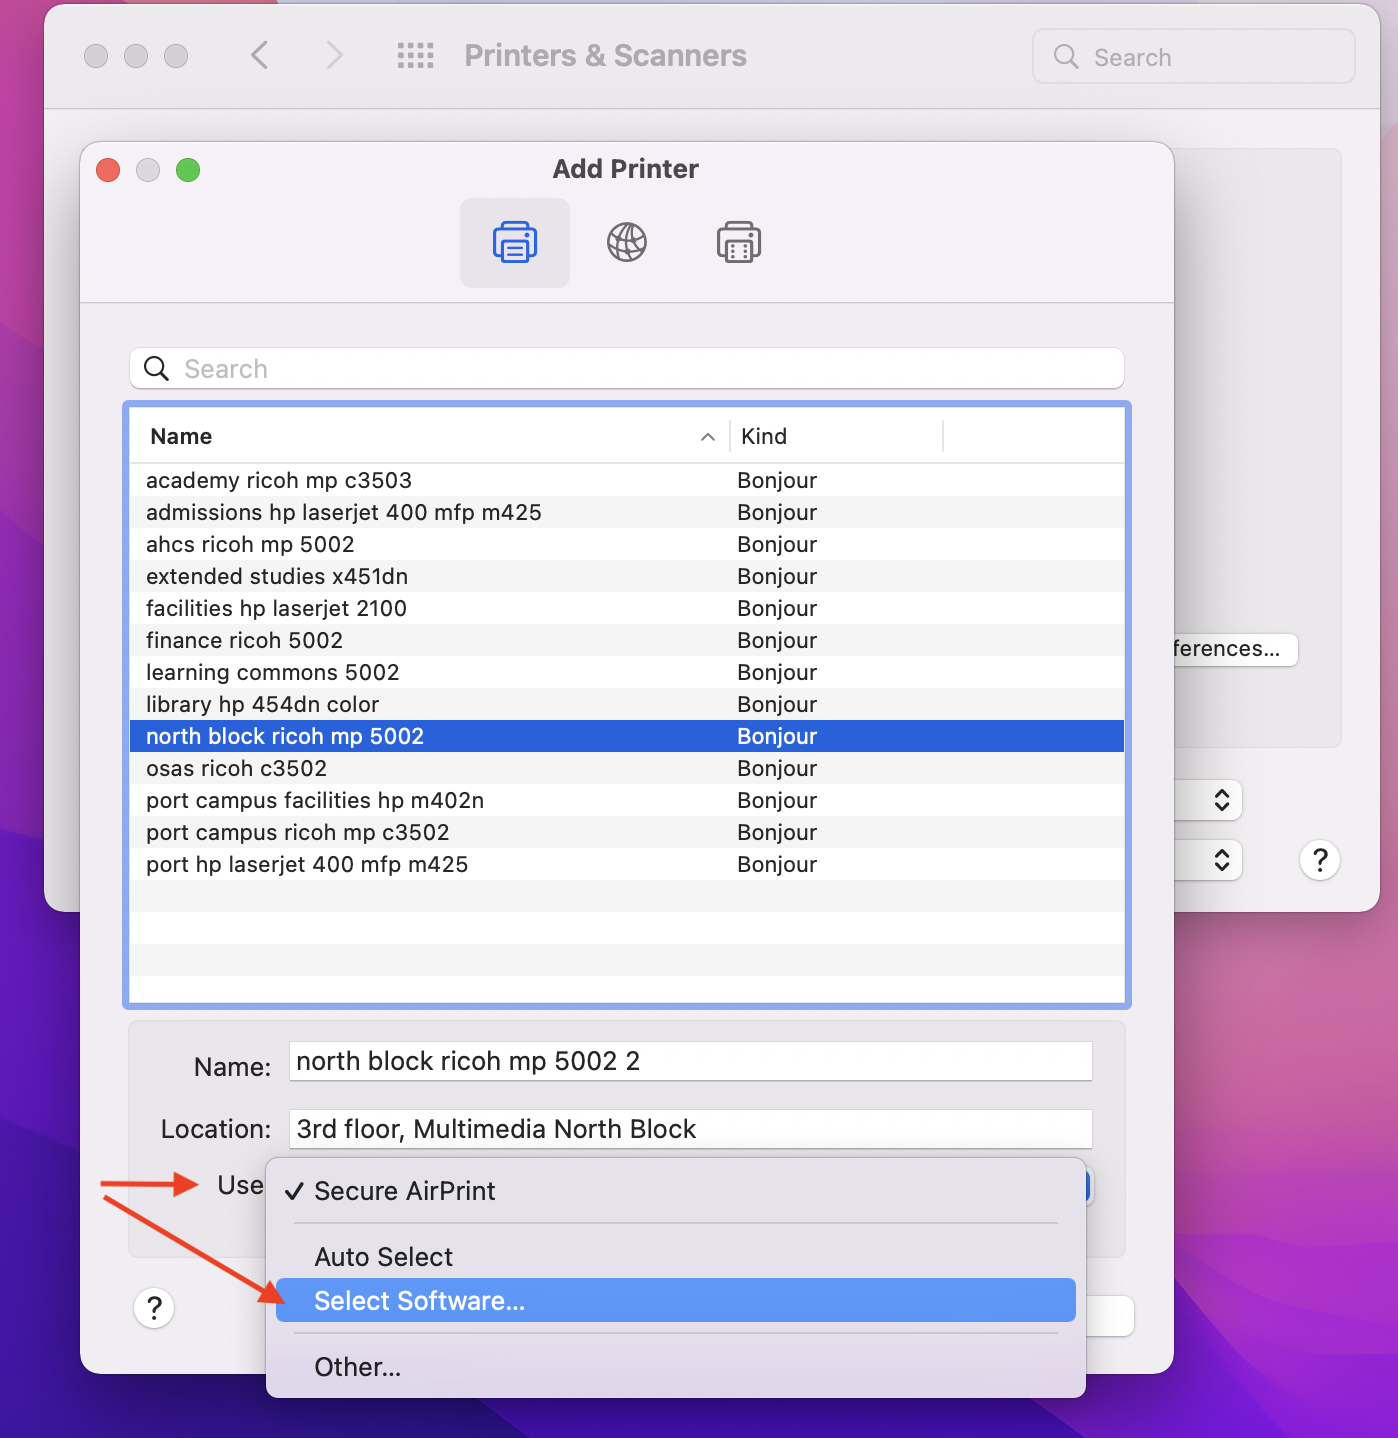
3. In the Add Printer window under the default method, look for the target printer name in the list. Department-specific printers with limited access may not be included in this list, in which case, please contact Computer Services for assistance. Select the correct printer, at which point the Name and Location fields will auto-fill. Please note, however, that the final “Use” field needs to be changed to “Select Software”:

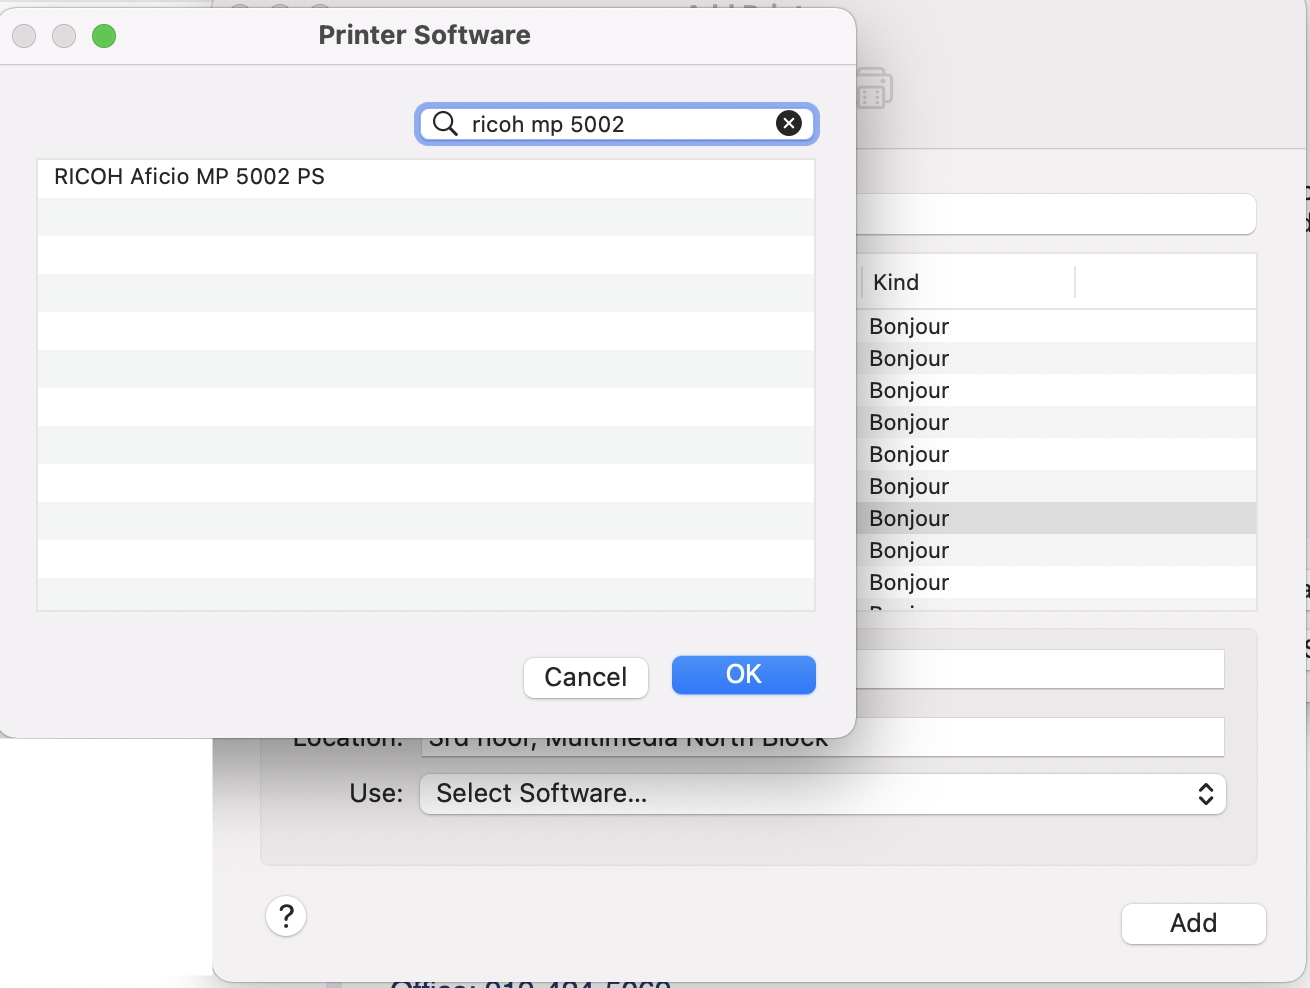
4. A new window will open where you can search for the driver you installed in step 1. Begin typing the make and model of the printer in the search field and, once you’ve found the correct one, highlight it and then click OK:

You will end up back at the Add window, where the correct driver should now show up in the “Use:” field. Click Add. A window will appear saying “Setting up (printer name)”. Do not change any of the options listed. Instead, just click OK to finish adding the printer.
When you send your first print job to the newly-added printer, NSCAD’s print server will ask you for your credentials. Enter your NSCAD username (do not include “@nscad.ca) and your password, then click the “Remember this password in my keychain” box so you’re not prompted for your credentials every time you print:

User Access Control
User access control is turned on for the AHCS Ricoh. To print to this printer, you’ll need to create a user preset that contains your division, department or individual faculty printing/copying code. Please see the following document for instructions on setting up a preset for printing.

