
Adding printers on a Windows PC
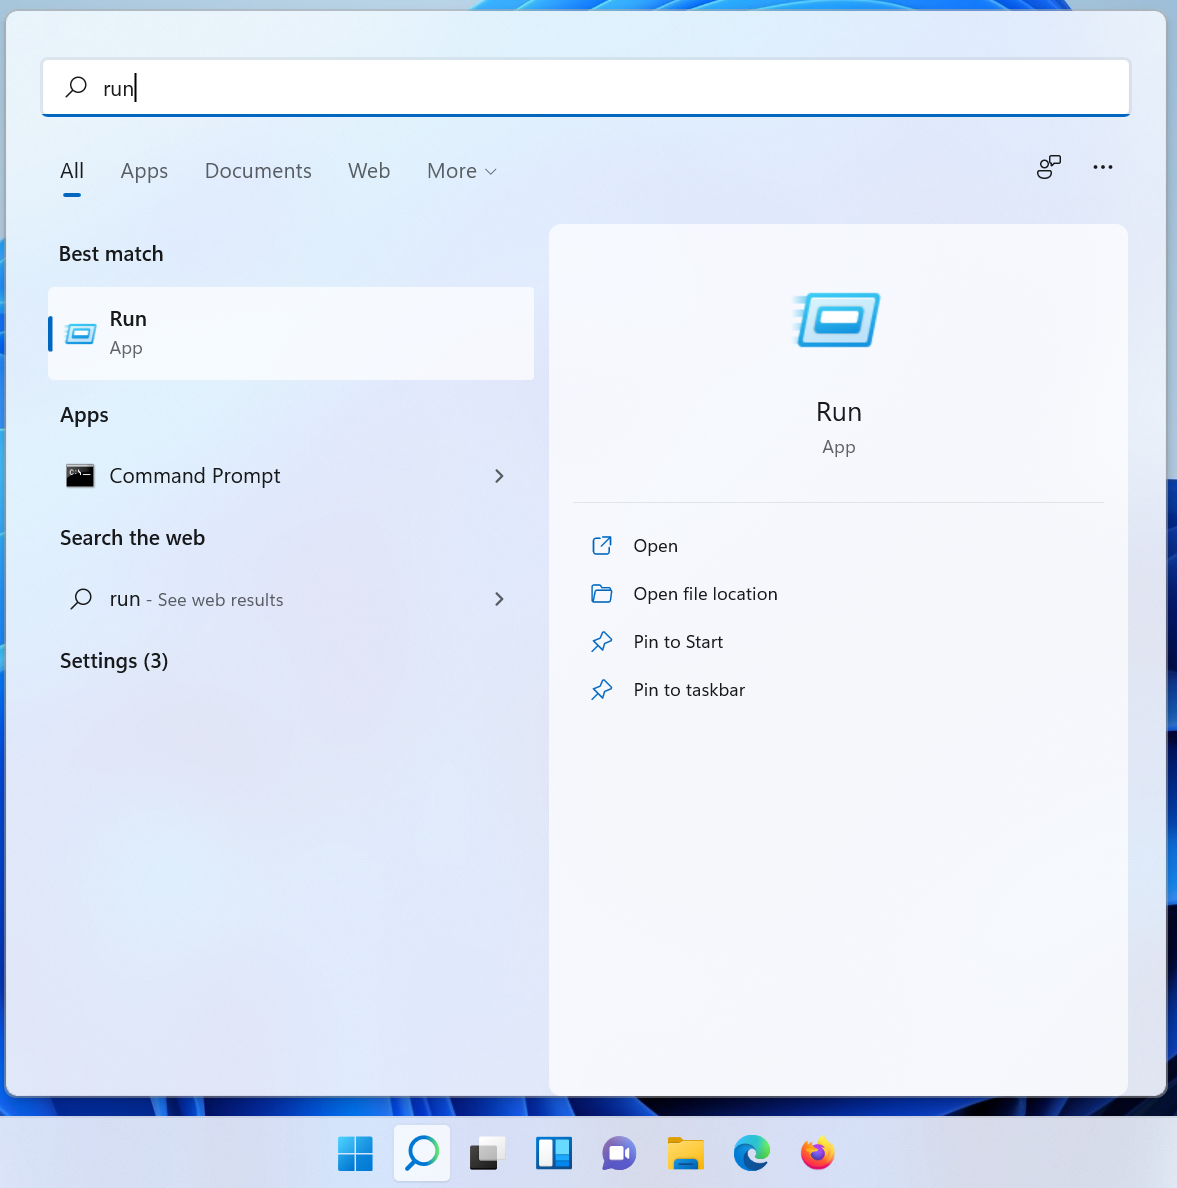
Using your computer’s search function, type in “Run” to pull up the Run app:
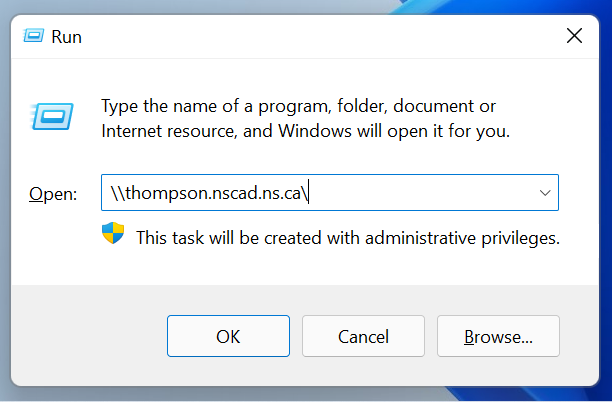
In the Run window, type \\thompson.nscad.ns.ca\, exactly as shown below, then click OK:
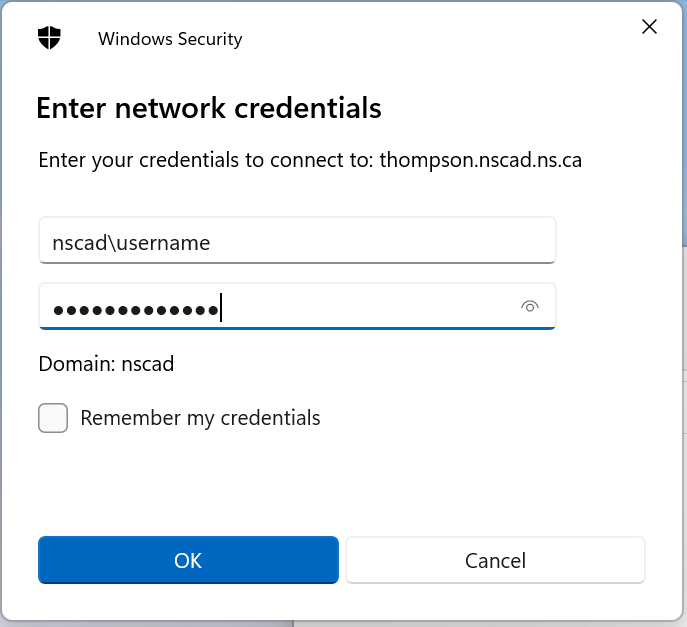
Unless you are already signed in on a domain-joined computer (i.e. a university-provided staff computer), you will be prompted to enter your NSCAD credentials. Use the same user name and password you use to log into other NSCAD resources such as Self-Service or Brightspace. If the “domain” is not being specified as nscad, add nscad\ in front of your user name. i.e. nscad\johnsmith. Click OK.
A list of printers should now be displayed. Look for the printer you want to connect to and double-click on it. Windows will automatically look for a driver and should begin to install it.
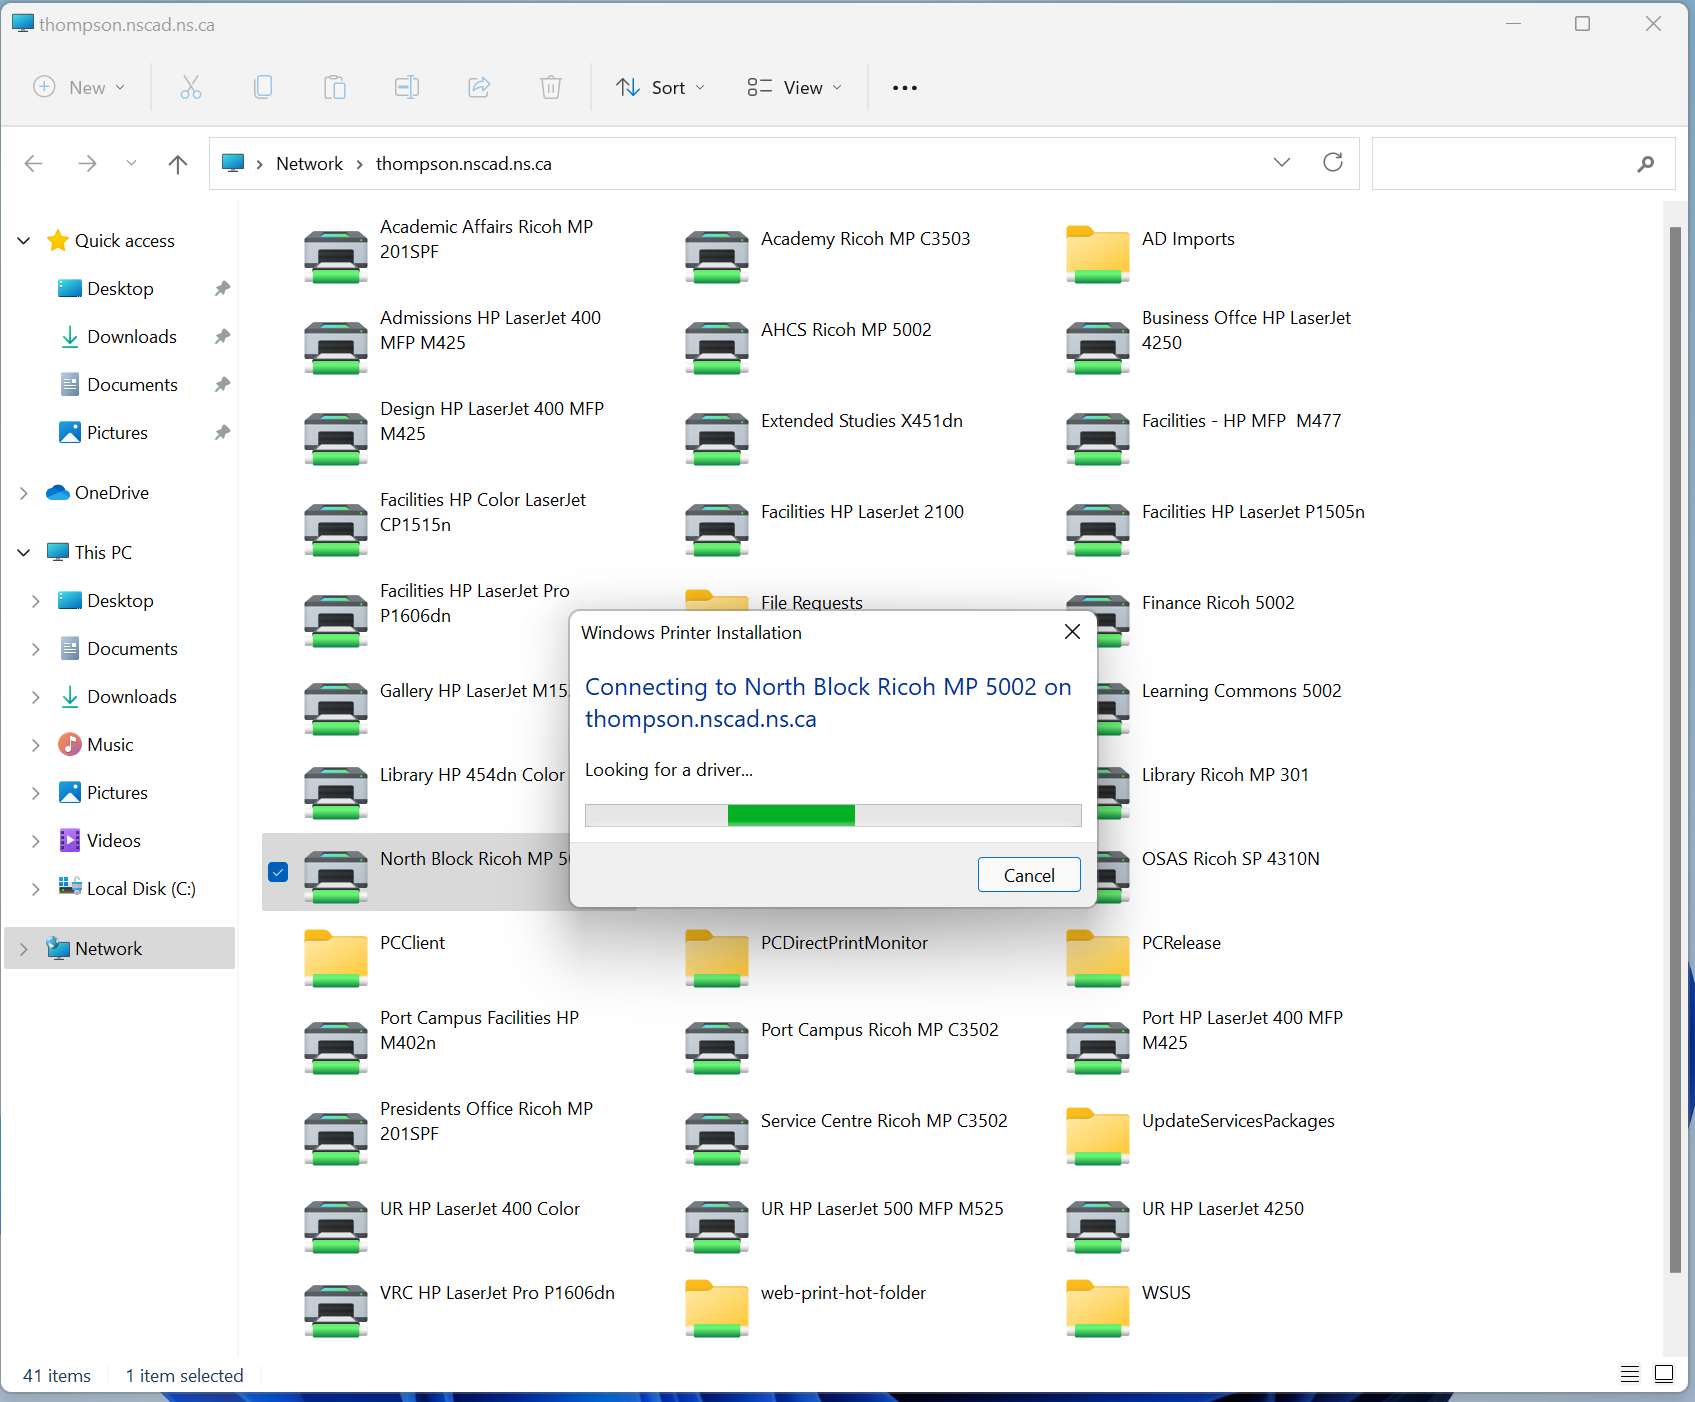
Once the printer is installed, it will display a print job status window for that printer. You can just close this window, as well as the main window displaying all the printers. The printer is now installed and ready to use on your computer.
User Access Control
Some Ricoh printers have the User Access Control feature enabled, in which case you need to save your department/division’s printing/copying code in the settings before you will be able to print. At the time of writing, only the AHCS Ricoh has this feature enabled. For all other printers, the User Access Control steps can be skipped.
To save your user code in the printer’s settings, open up the list of installed printers on your PC and right-click on the relevant one. Choose Printing Preferences from the dropdown menu. In the Preferences window, choose the Detailed Settings tab, then highlight Job Setup in the menu, and lastly, enter your user code in the User Code field. Click on Apply and OK and you’re done. As long as you entered a valid user code, you should now be able to print.