
Scheduling a TeAms Meeting
By creating your meeting in Microsoft Outlook, you can use the “Scheduling Assistant” to add invitees and see information about conflicts on individual calendars.
Functionality and options differ between Windows and Mac versions of Outlook, and even between older vs newer versions of Outlook for Windows, so to reduce confusion, we’ll use the Office 365 Calendar App to demonstrate the steps for scheduling a Teams meeting.
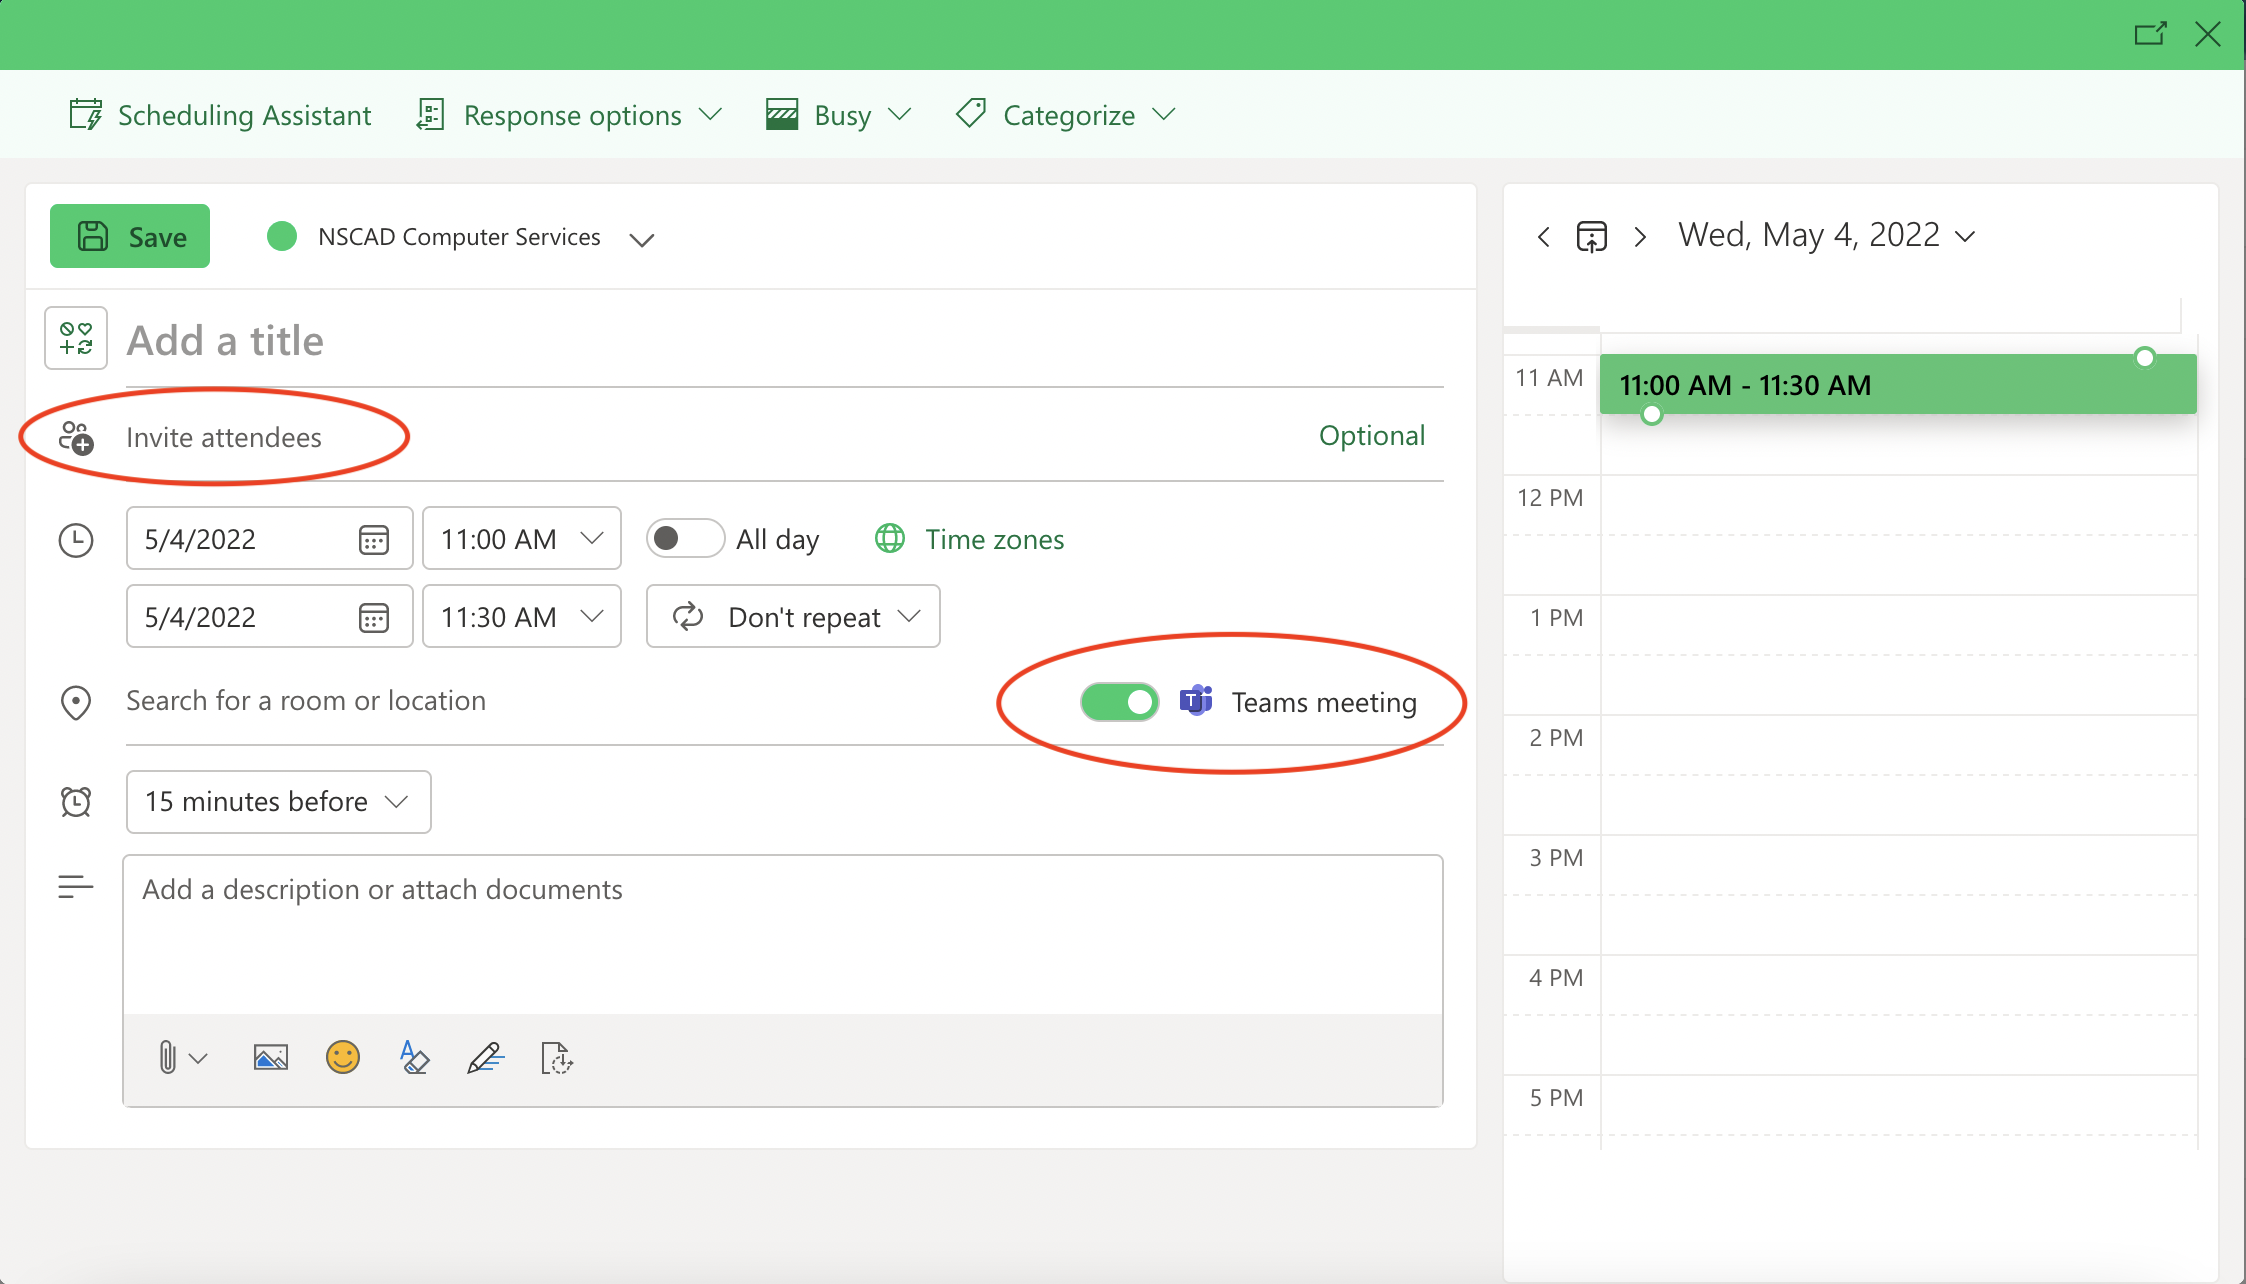
Sign into Office 365 online and choose the Calendar application, then click on New Event:

When the event form opens, slide the “Teams Meeting” button to the on position and then add the meeting details and invitees:
As you add your invitees, Office 365 will do some calendar conflict checking for anyone within your own organization, the results of which can be seen on the right. To further check for and resolve conflicts, open the Scheduling Assistant from the top menu bar.
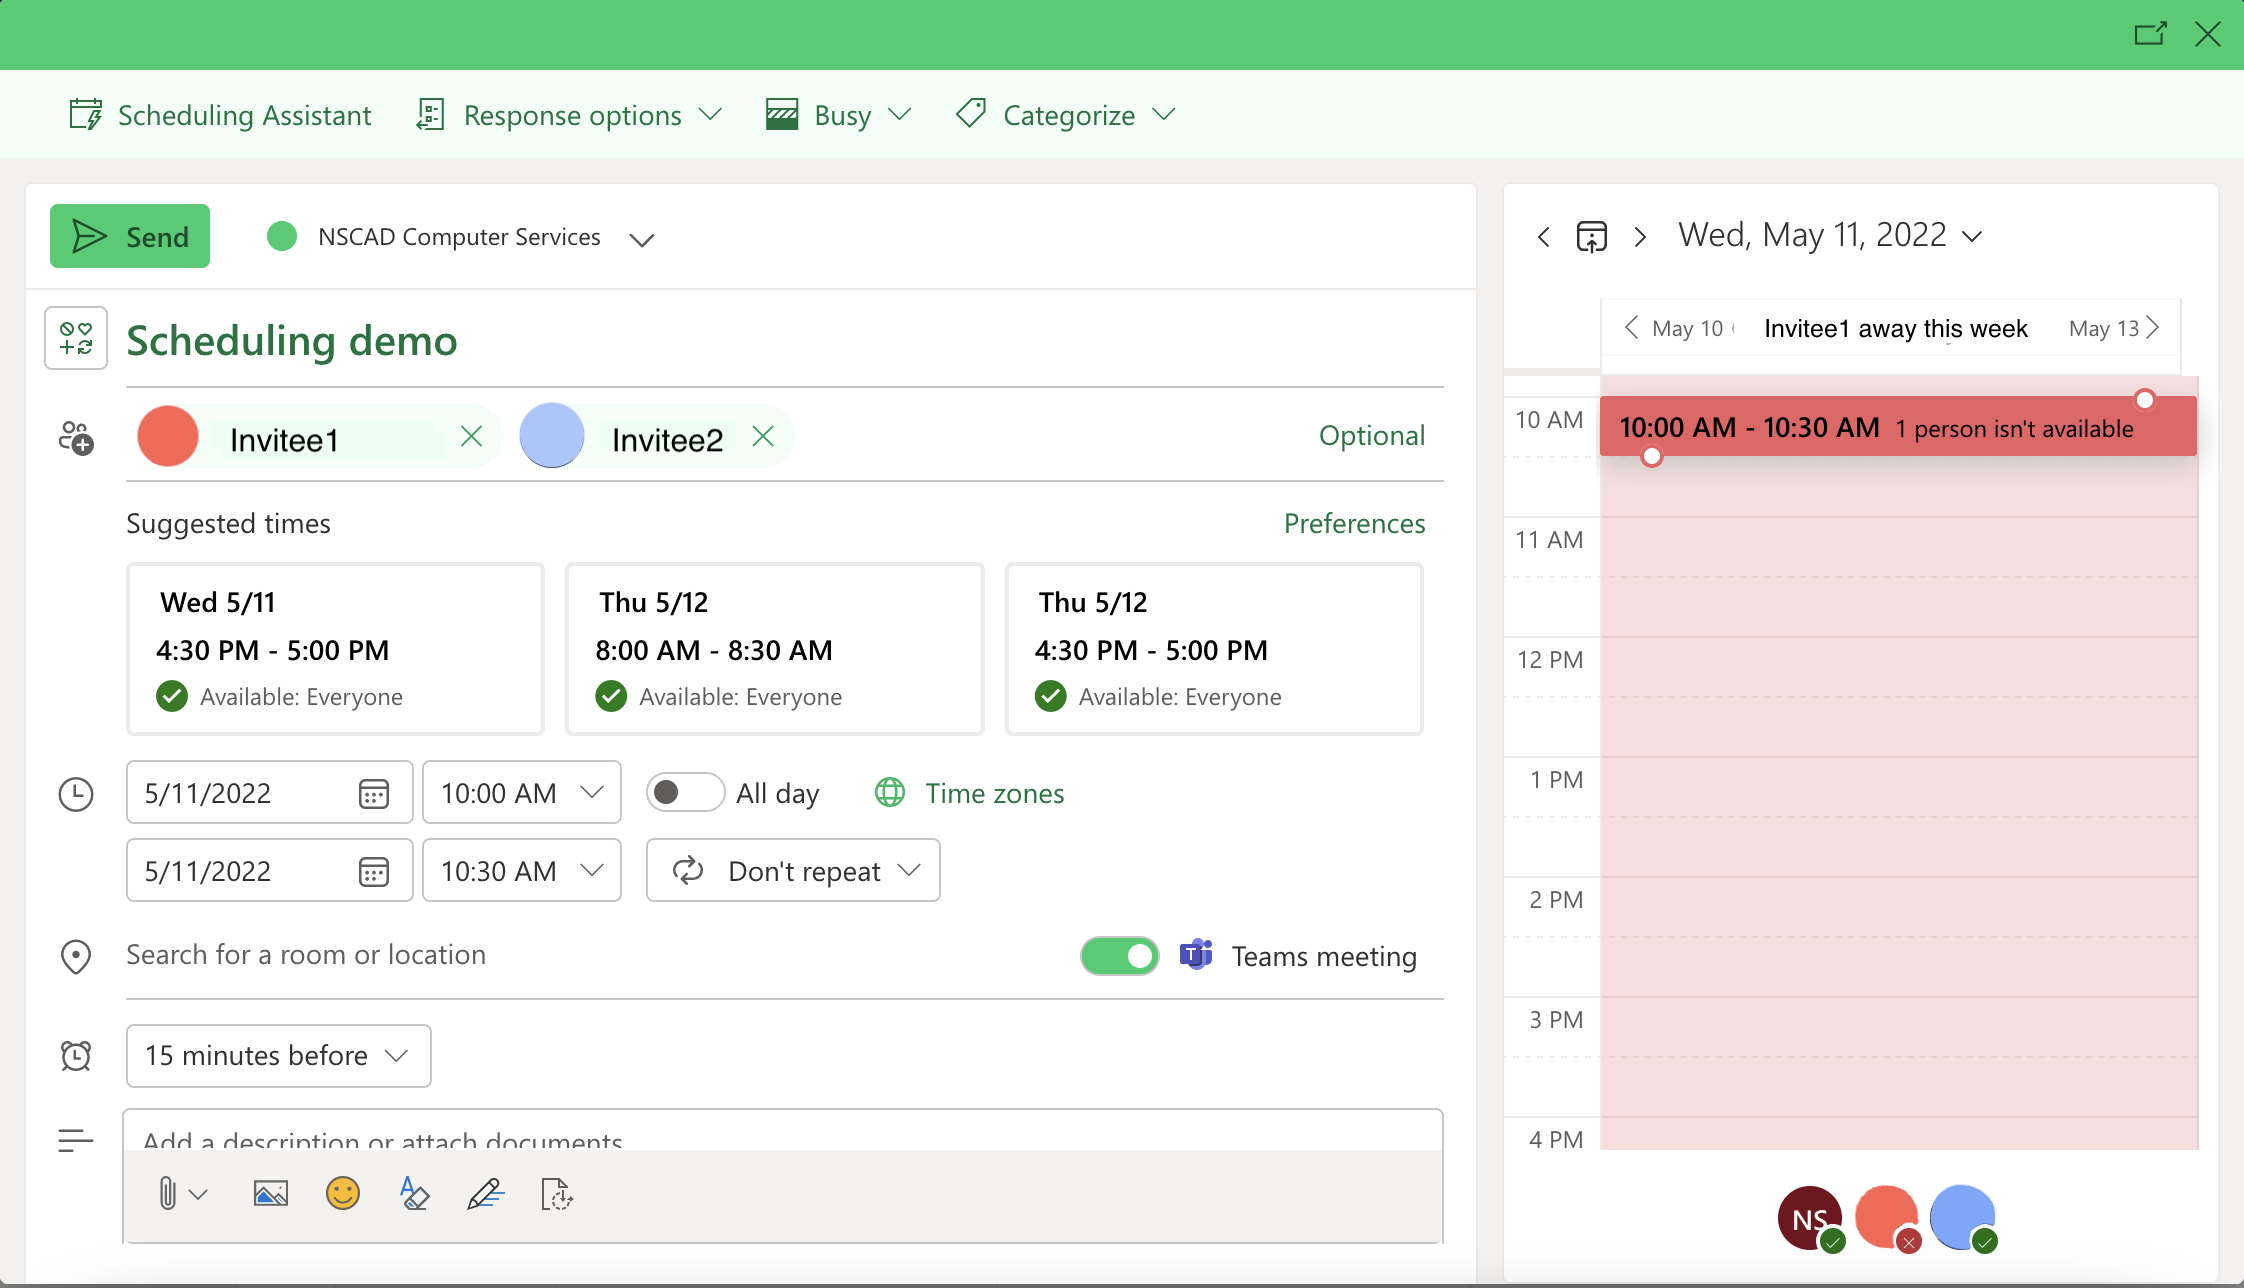
Once you have finished scheduling everything, click Send at the top left to send out meeting invitations. Once the attendees have accepted the meeting invite, it will populate their own calendars with the meeting details and a convenient link to join the meeting.
You can also schedule a meeting from within Teams. The Teams App is recommended, and in many cases, necessary for participating in a Teams meeting due to web browser limitations.
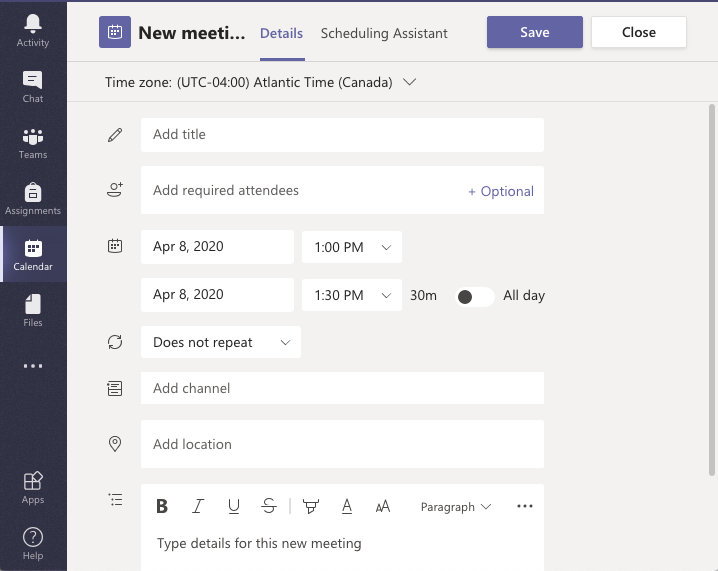
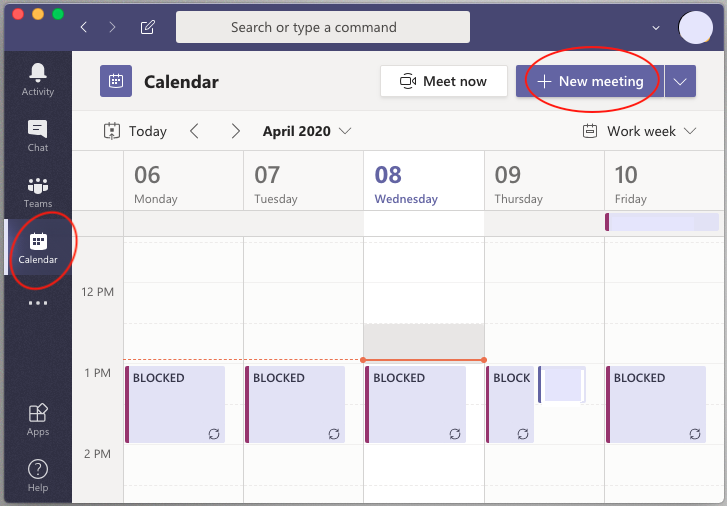
To schedule a meeting from within the Teams App, click on Calendar, then New Meeting:
Fill in the meeting details and choose your attendees, then click “Save”. Note that just like Outlook, you can use the Scheduling Assistant to help you find a time that fits with everyone’s schedules.